Typography
In the typography settings, you can customize the font family for your Headings and Body text by selecting your preferred font. You can choose from two types of fonts: Shopify fonts, available in the Customizer, or Google Fonts, which can be searched and embedded directly from Google.
In Shopify, you can customize the typography settings to match your store's branding.
Step 1 : From your Shopify admin, go to Online Store > Themes.
Step 2 : Find the theme that you want to Edit and Click Customize.
Step 3 : Click Theme Settings.
Step 4 : Go to Theme Settings > Typography
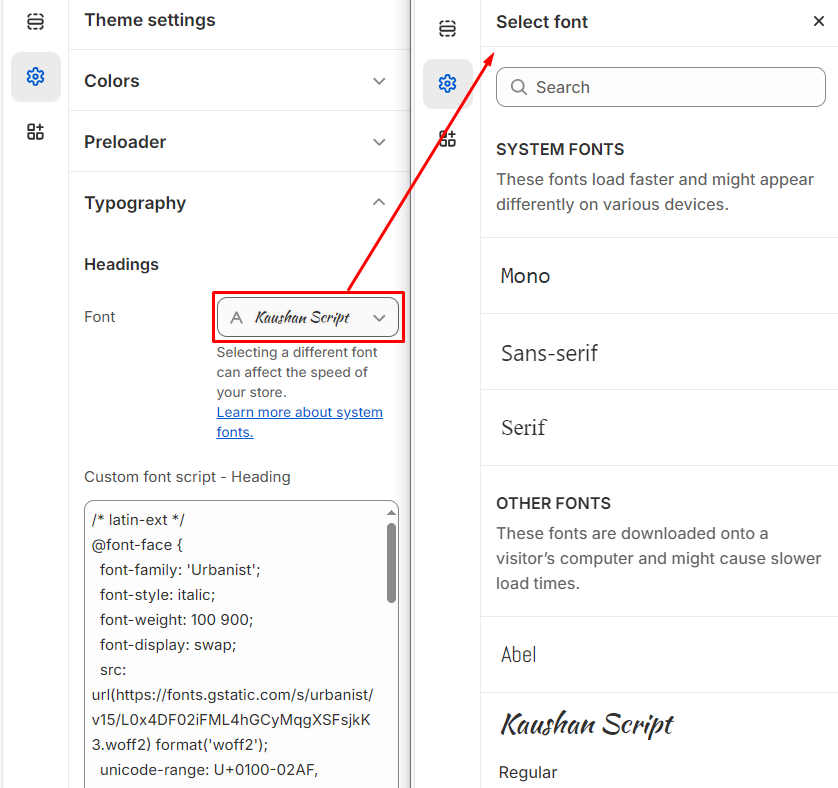
Shopify fonts:
Select Font from the customizer drop and select the required font for heading and body respectively.
Both the Body font and Heading font can be customized by following these steps.
Google fonts:
Visit Google Fonts: Go to Google Fonts and select your desired font.
Choose Styles: Pick the styles you need (e.g., Regular, Bold).
Copy Embed Code: Under the "Embed" section, copy the
<link>code from the "Standard" tab.Add to Shopify:
Go to Online Store > Themes > Customize > Theme Settings.
Paste the embed code into the Custom Heading Font or Body Font box.
Save Changes: Apply the changes to update the font across your store.
Additional fonts:
For subheadings or other text, you can use Google Fonts or Shopify Fonts.
Follow the steps to embed the desired font in Theme Settings, selecting the text section you want to apply it to.
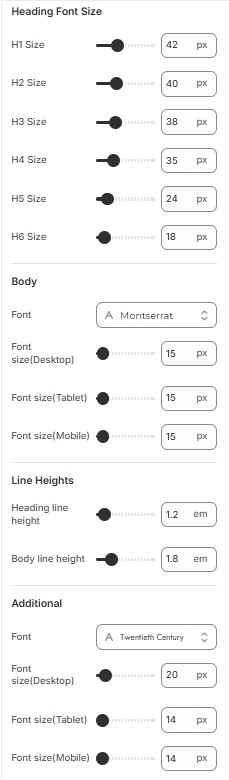
Customize your font sizes
You can set the default font sizes for your headings and body text with the Typography theme setting.
Heading font size : There are six types of headings, H1 to H6, which can be adjusted as per the theme requirements.
Body (Font size) : Adjustment of body fontsize of Desktop ,Tablet and Mobile can be done as per theme requirements.
Line height: It use to adjust the line height of heading and body fonts.
Additional Font size: Adjustment of additional fontsize of Desktop , Tablet and Mobile can be done as per theme requirements.
Custom Font Script
Google Font using custom font (eg., @import url('https://fonts.googleapis.com/css2?family=Fredoka+One&display=swap');)
Custom font
Google Font using custom font (eg., 'Fredoka One', cursive;)